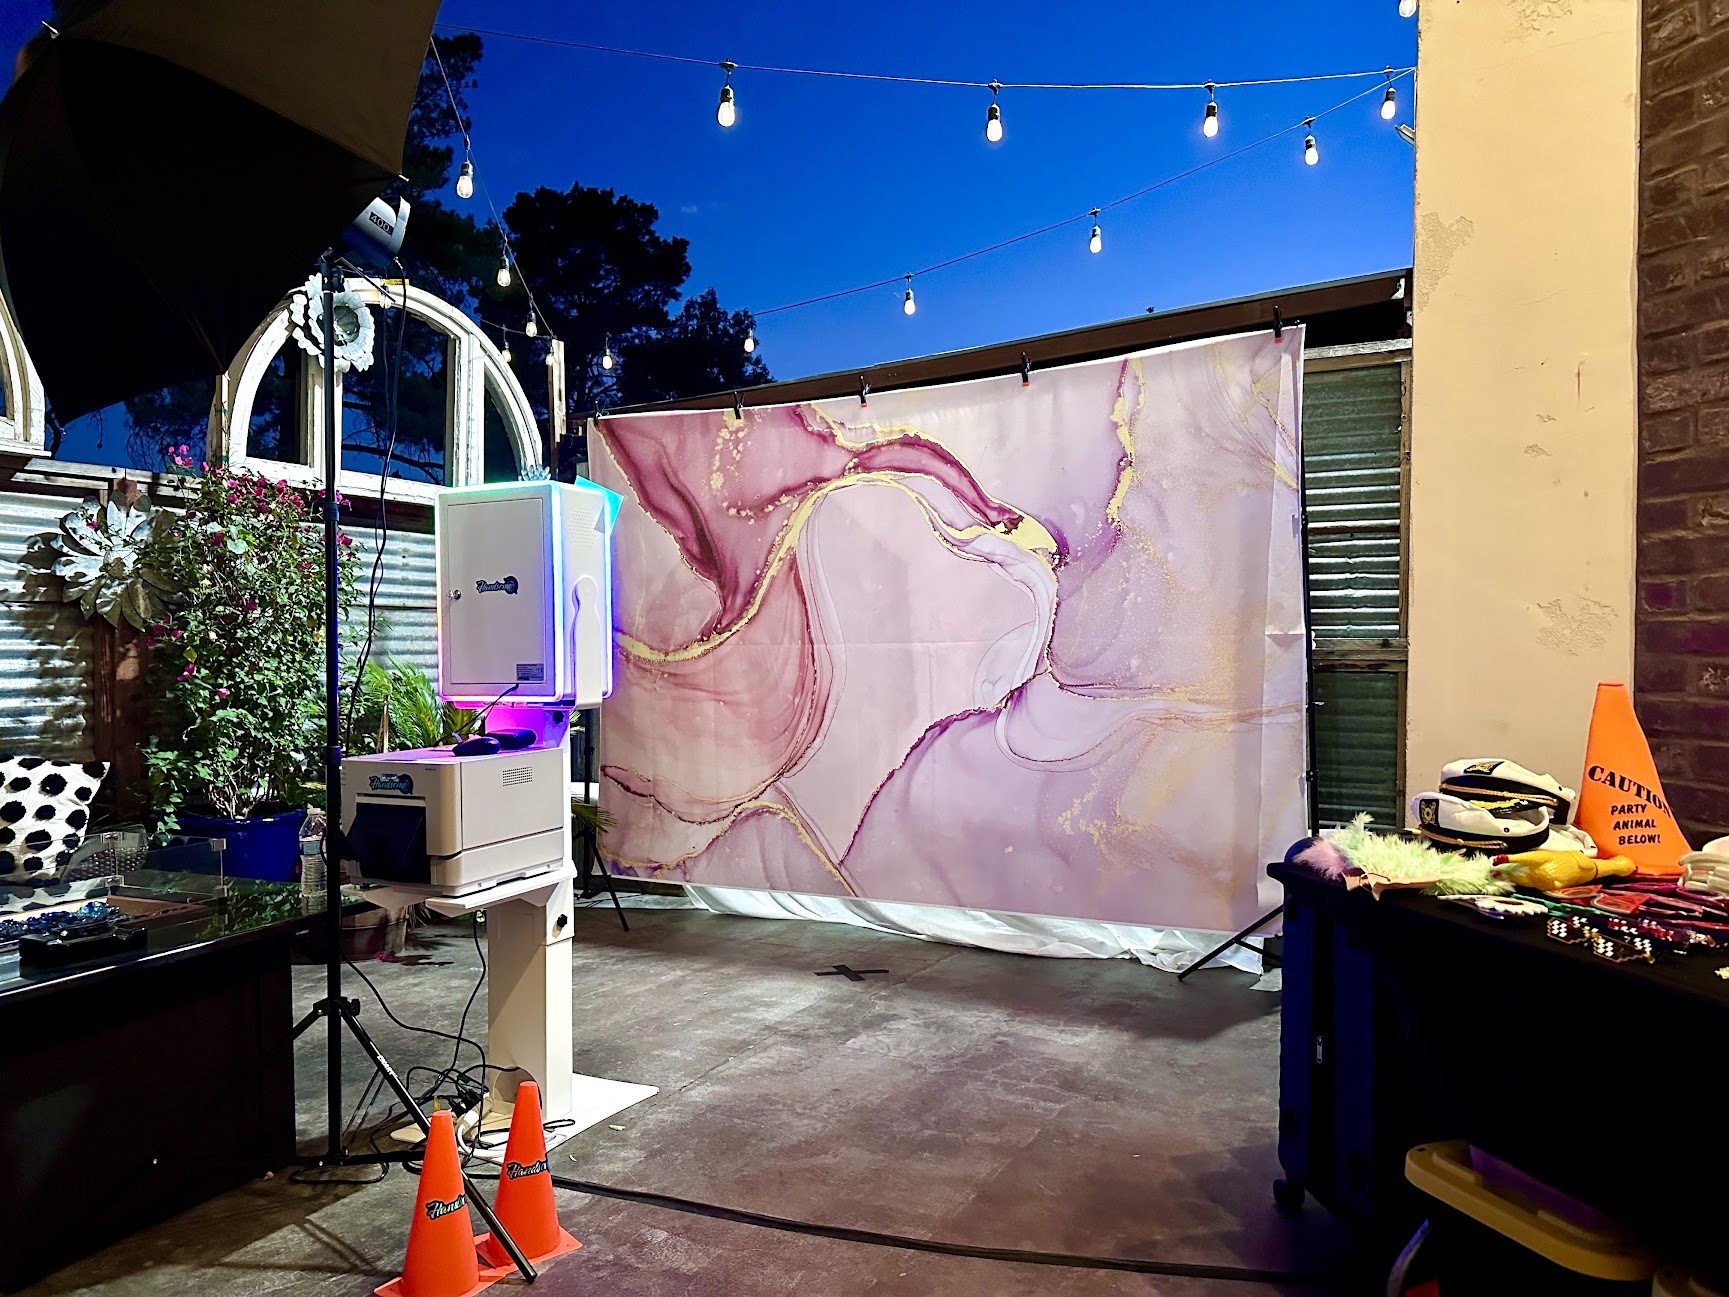
A photo booth should fit into the reception plan as comfortably as the bar or dance floor. Before you finalize the floor plan, confirm the footprint, power source, setup access, and the route guests will use to reach it. This checklist is designed for couples and coordinators planning a Bay Area wedding with an open-air booth.
For Handsome Photobooth, plan for roughly a 10 ft × 10 ft setup and one standard power outlet within reach. That estimate covers the booth, backdrop, and prop table. Leave additional space for guests waiting their turn. If your room is tight, send us the floor plan so we can discuss the layout before booking.
1. Mark the booth and queue on the floor plan
Measure usable floor space after accounting for dinner tables, chairs, doors, and service stations. A corner that looks empty on a diagram can become a busy walkway once the reception starts. Ask the coordinator to mark the booth footprint and a separate waiting area, with a clear route for guests and venue staff.
- Keep exits, accessible routes, and service paths clear.
- Leave room for groups to enter and leave without walking through the next photo.
- Place the booth where guests can notice it, without blocking the bar or dance floor.
- Ask whether the backdrop or prop table conflicts with venue decor or room changes.
2. Confirm power before choosing the corner
Our setup needs one standard outlet within reach. Have the venue identify the outlet on the plan and confirm that it will be available during setup and operation. The venue and booth team should agree on cable routing so it does not create a trip hazard.
If an outlet is shared with other event equipment, ask the venue and vendor to confirm that the arrangement is suitable. Do not assume a distant outlet or an extension cord across a busy doorway will work. Send a photo of the proposed spot when the outlet location is unclear.
3. Check Wi-Fi and digital sharing
Handsome Photobooth includes QR downloads and a digital album. Venue Wi-Fi is helpful, and our team can use a mobile hotspot when venue Wi-Fi is limited. Connectivity depends on the actual location, so discuss weak cell reception, guest-network login screens, and outdoor areas before the event.
Ask how digital delivery will be handled if the connection is unreliable. Keep the distinction clear between taking and printing photos and getting digital files to guests. A final plan should set realistic expectations for both.
4. Share load-in and breakdown details
Our website describes arrival about one hour before the event for setup, with breakdown after the rental ends. Confirm the arrival window for your booking rather than assuming every venue allows the same timing.
- Provide the vendor entrance, loading location, and parking instructions.
- Flag stairs, elevator access, long equipment routes, and locked doors.
- Share any insurance-document requirements and submission deadlines.
- Give the team a day-of contact who can approve the final placement.
- Confirm when equipment must be removed and whether other activities will block that route.
5. Make an outdoor backup plan
For waterfront, garden, or patio receptions, ask the venue and vendor to agree on a protected setup and an indoor alternative. Wind can affect backdrops and props; direct sunlight can change the photographic setup; rain requires a different plan. A patio location should be confirmed with the booth team rather than chosen from a venue photo alone.
For Alameda celebrations, include bridge or tunnel routing and the actual venue loading instructions in the vendor notes. For San Leandro and other East Bay events, share the specific building entrance and parking arrangements. City names alone do not tell the team how to reach the reception room.
6. Match operating hours to the reception
Set a start time that fits guest availability. Cocktail hour and dancing can offer useful windows, while dinner and speeches may draw attention elsewhere. Read our wedding photo booth timeline guide and agree on any pause with the vendor before the schedule is final.
A quick checklist to send your coordinator
- Confirmed booth footprint plus queue space
- Available outlet and agreed cable route
- Wi-Fi or mobile connectivity plan
- Load-in entrance, parking, and setup window
- Day-of contact and any venue paperwork
- Outdoor protection and backup location, if applicable
- Operating hours, any pauses, and breakdown timing
Ready to check availability? View our Bay Area wedding photo booth package or send your wedding date and venue. For budget planning, see our package and add-on cost guide.